Create an account on Dcontrol.com
How to create an account on Dcontrol.com
In order to create an account on Dcontrol.com you need to do just a few simple steps:
1. Visit the Dcontrol.com website.
2. Click on the Login link in the upper right corner and then click on the Create a new account button

3. Provide basic details like your email, first name, last name, and password then click on the Create account button.

You can also use an easier way by signing up through a Google or Facebook account
Add your company
How to add my company
Once you have created an account, you can add your company, for this you can go to the settings of your account by clicking on Personal Account in the upper right corner of the window and going to the menu tab Profile settings.

In the My companies tab you can add your company by clicking the Add company button


In the window that opens, you can add your company by specifying the authority number (MC Number or USDOT), if you enter one of the numbers above and click on the search button, information about your company, such as company name, address, phone or postal address, can be pulled up automatically.
If you want to add a trucking company that has valid authority numbers, it’s own trucks, trailers, and offers carrier services, you need to activate the check mark Carrier dispatch

You also need to check the box – I hereby certify that I am authorized to represent this company and click on the button:
<Claim and Verify this company>.
The company you added will appear in the list of your companies. A confirmation email will be sent to the official email of the company you added, and the company will be displayed in the status of Waiting for Verification, until you confirm via email address.
If you do not have an authority number you can add a company manually by clicking on the tab – I do not have an authority number and filling in the form fields manually

Once you have filled in the data, you need to click Next, the company will appear in the list of your companies. The company is added manually, without the use of authority numbers that does not require verification, it will immediately be in the status of verified.
Add your parking lot to the system
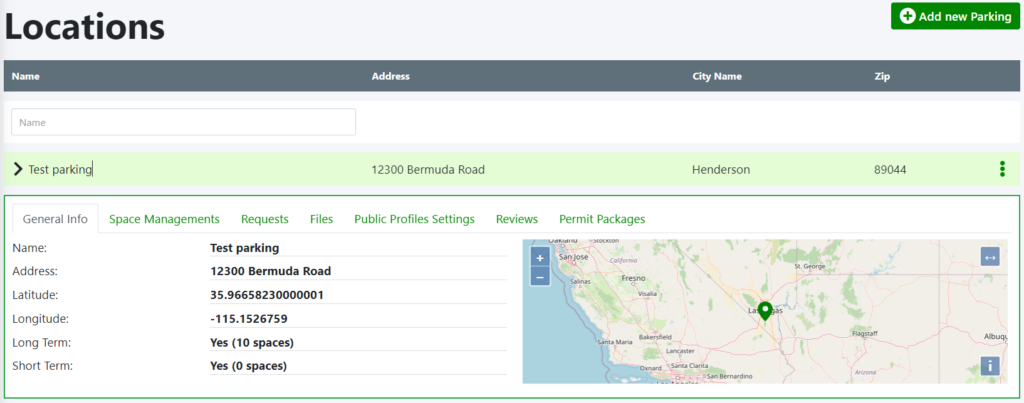
In order to start working with the parking module in our system, first of all you will need to add a parking location to the system, for this in the Parking module, in the Locations section, click on the Add new parking button, the form for adding a parking location will open.
At the first step of the form, you will need to indicate the address of the location, as well as the name of the parking location.

In the second step of adding parking, you need to specify what types of parking spaces are available in your parking lot, specify the number of parking spaces you plan to rent, and if the parking lot is divided into zones, specify the names of the parking zones.

In the third step, you need to add the rates for the parking spaces offered by your parking lot. After adding tariffs, you will be able to issue invoices to your customers, and there is also an option to mark the tariffs that will be available in your public profile, which will be automatically created after adding a location.

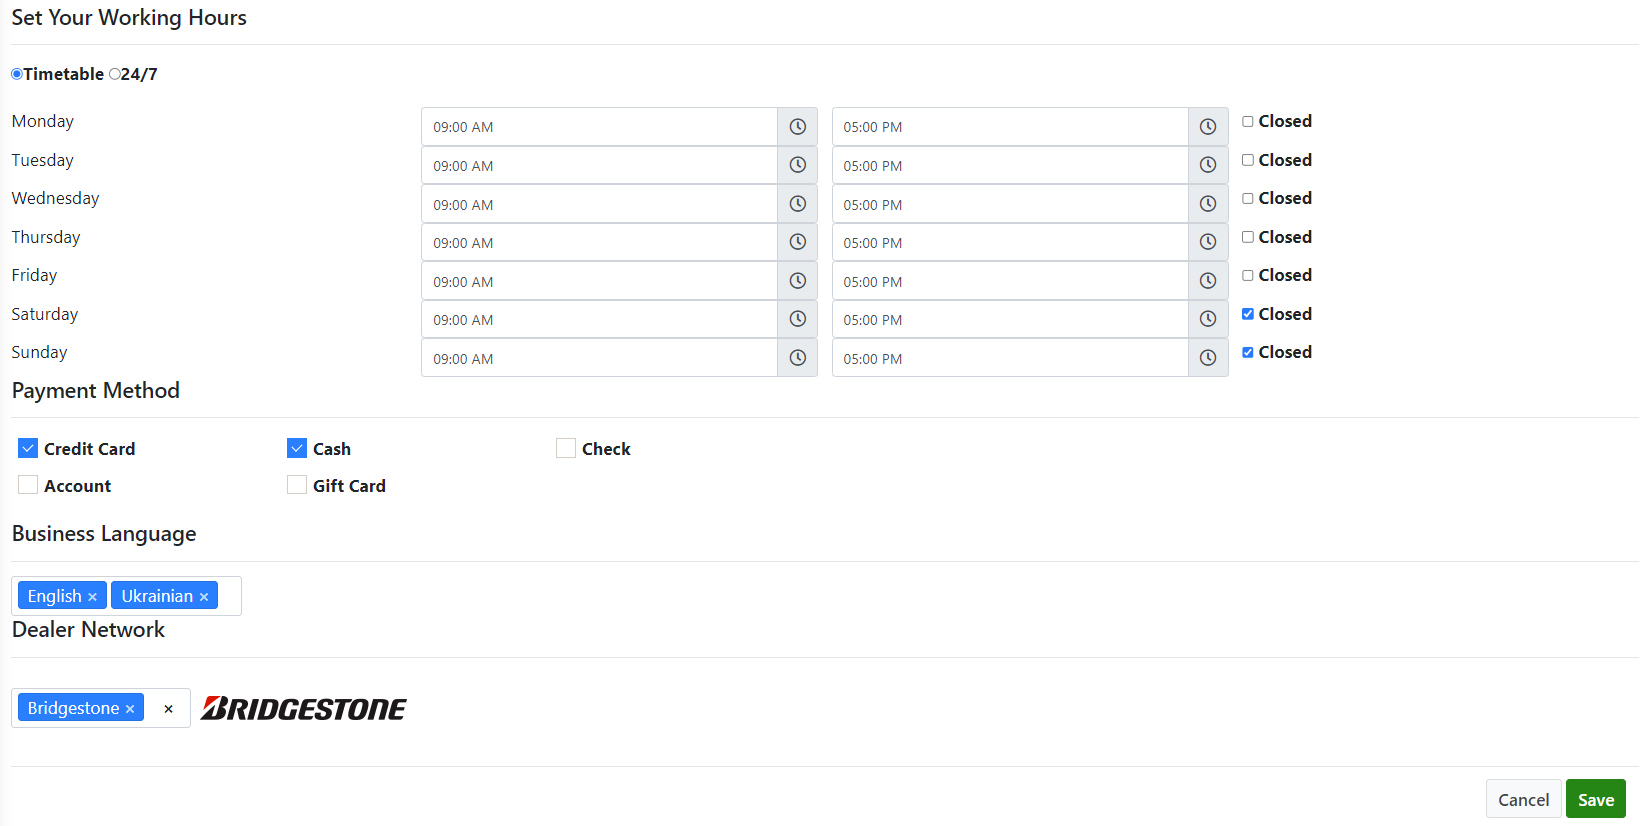
In the fourth step, you can add a description of your parking lot, specify the contact details of the person responsible for the parking lot, upload a photo of your location, specify the types of services that are provided at your parking lot, and also specify what facilities can be used by the customers of your parking lot.

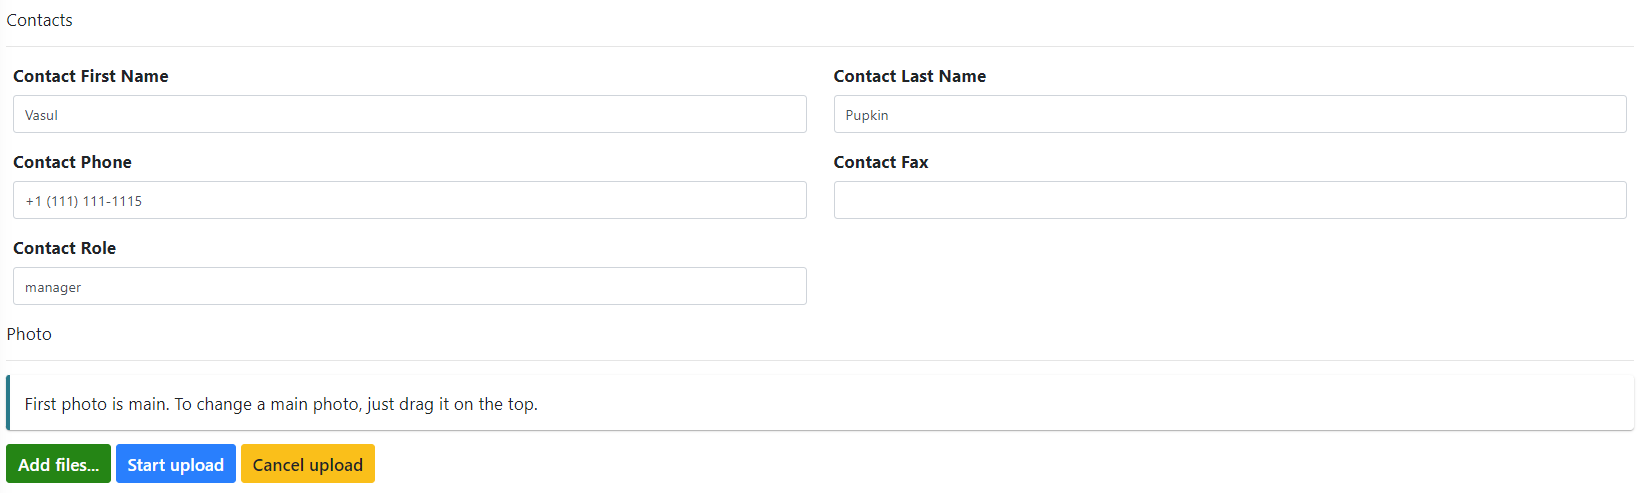
You can also specify the hours of operation, the types of payments that can be used at this location, the languages in which your company’s employees communicate, as well as the dealer networks with which you cooperate.
After filling in all the necessary data, you need to save the form by clicking on the Save button. Your parking location will be created in the Locations section.

In addition, a public profile of your parking lot will be created on our resource, through which potential customers of your parking lot will be able to leave parking requests for you.
Add your parking customers to the system
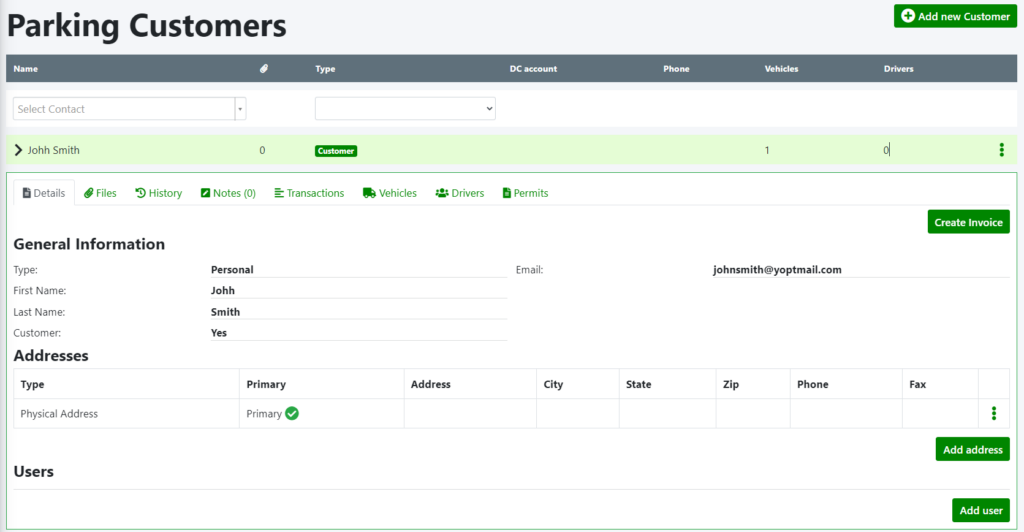
After you have added your parking lot to the system in the Locations section, you need to add your parking customers for whom you will create permits to access the parking lot.
To do this, in the Customers section, you need to click on the Add new customer button, the customer addition form will open.

If your customer is a private person, you need to select the personal tab and fill in the necessary data. The main fields are First name and Last name, cell phone and email. You can also specify additional information about your customer, which is specified in the form.
If your customer is a company, select the Company tab and fill in the appropriate fields in the form and click the Save button, the customer will appear in your list of customers.
After adding a customer, you need to add vehicles owned by him, as well as data about drivers who will drive these vehicles.
In order to add a customer’s vehicles, you need to click on the customer’s field in the list of customers and in the window that opens, select the Vehicles tab
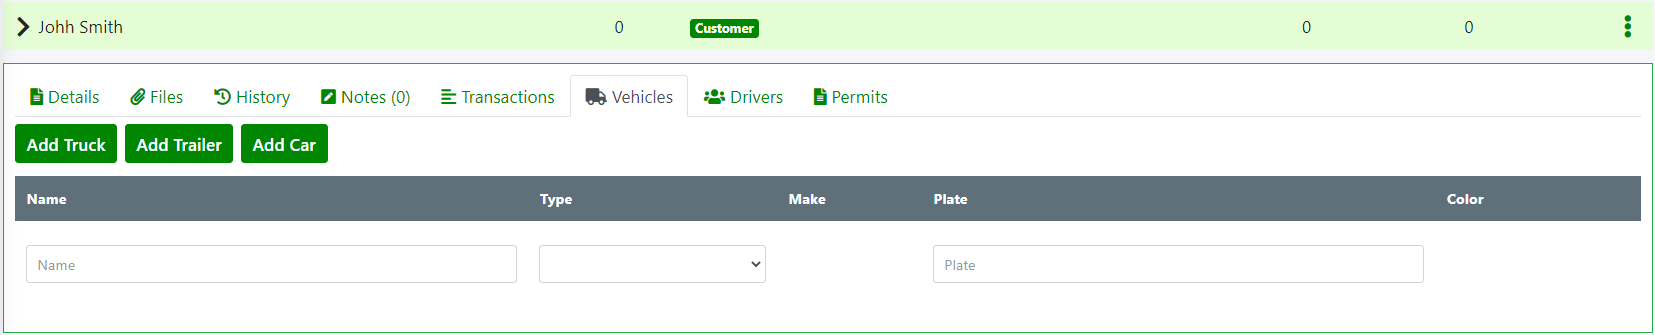
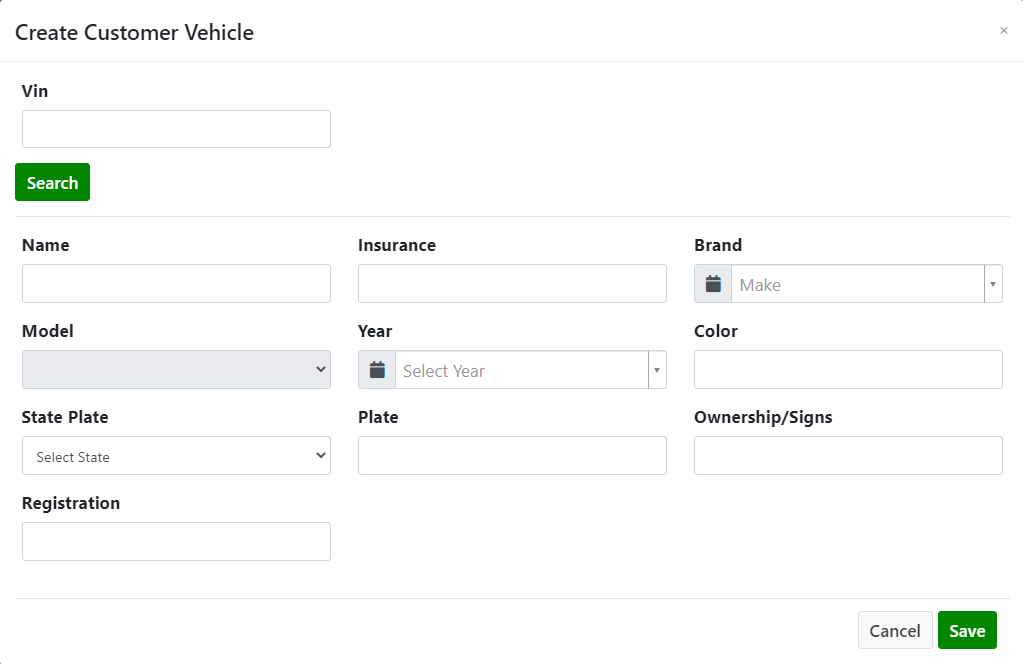
Clicking on the button Add truck, Add trailer or Add car will open the form for adding a vehicle. It is necessary to fill in the appropriate fields and save the form.
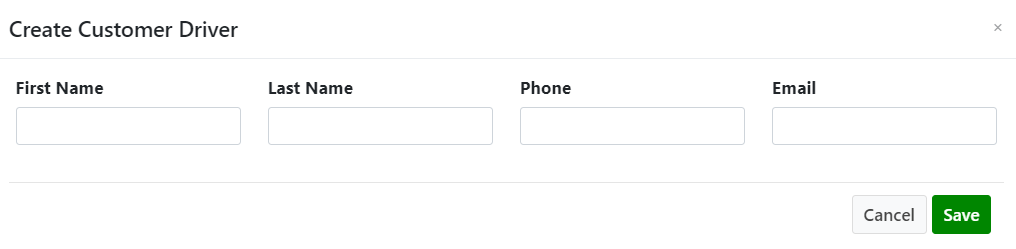
In the Drivers tab in the customer’s parking window, you can add drivers who can drive the customer’s vehicles.
Create parking permits for your customers
After you have created a parking location and added your customers to the system, you can create permits for parking access.
In order to create a permit, you need to go to the Permits section in the Parking menu and click on the Add permit button.
In the form that opens, you need to fill in the following fields:
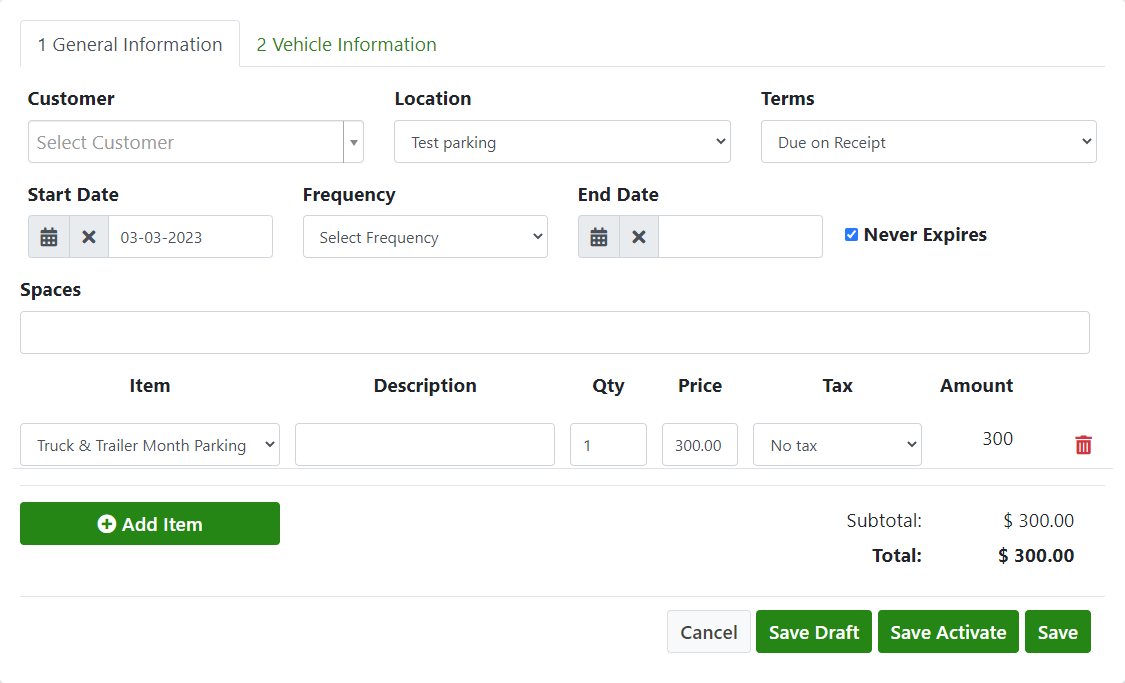
Customer – select the customer for whom you want to create a permit
Location – select the parking location for which you want to create a permit (if you have only one location, it will be selected by default).
Terms – specify the terms when the client must pay for the permit
Start date – specify the date from which the permit will be valid
Frequency – specify the frequency with which the parking invoice will be sent
End date – the date of termination of the validity period of the permit
Never expires – you can put this mark in the case when there is no final date of validity of the permit, that is, the permit will be automatically extended and the client will automatically receive invoices about the need to pay for the permit.
Spaces – indicate which parking spaces the customer is booking
Item – in this field will be available your parking rates, which you added in step 3 of adding parking. If necessary, you can select Add item and the form for adding a new item will open.
Description – add a description if necessary.
QTY – the number of parking spaces reserved by the customer.
Price – the price of the parking space that you specified when creating the location, if necessary, you can change it.
In the second step of creating a permit, you can specify information about vehicles. Vehicles that were added when creating a customer parking lot will be available in the list. You can also indicate who is the driver of the vehicle, as well as choose a parking space.

After you have filled out the form, click the Save and activate button.
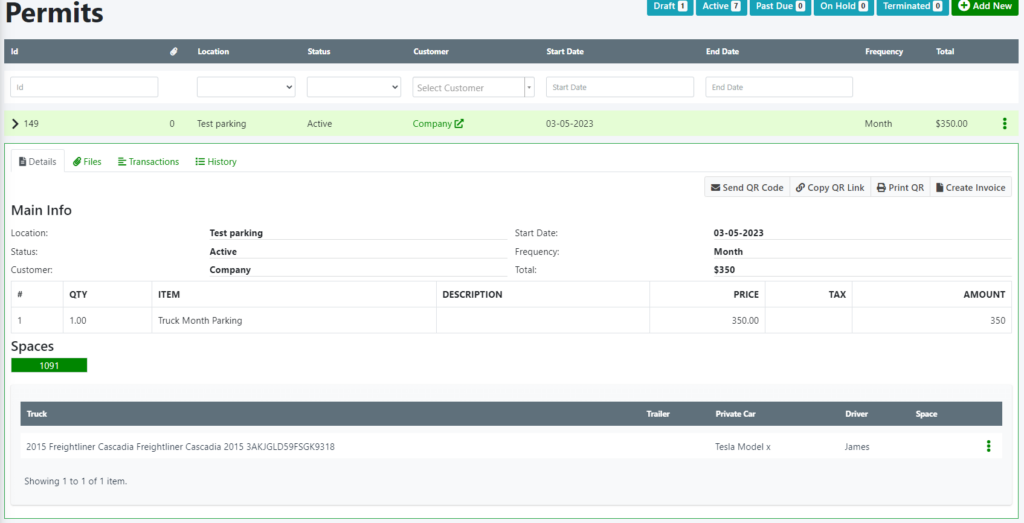
The permit will be created and it will be displayed in the list of permits.

Clicking on the permit field will open a window with detailed information on the permit.
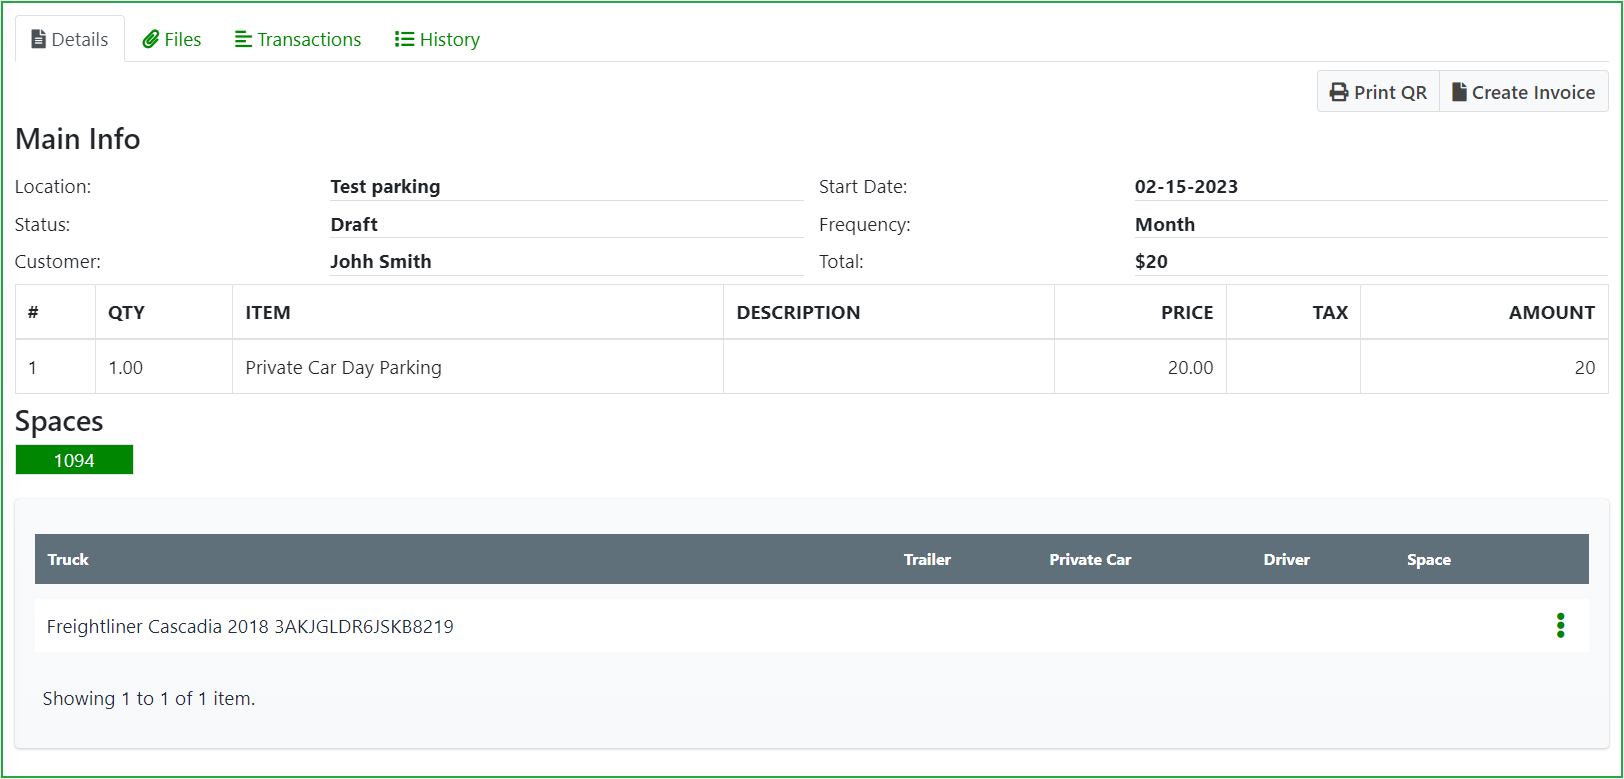
The Details tab contains basic information on the permit: location, status, start date and end date, frequency of invoicing.
In the Files tab, it is possible to upload files to the permit, for this you need to click on the Upload button and select the necessary files for upload.

The Transactions tab will display all transactions that were carried out under this permit.
![]()
The History tab will display the history of all changes made to the permit in the system, with the specified time, date and user who made the changes.
Receive parking requests through your company's public profile
The Requests tab in the left menu of Parking manager will display new parking reservation requests that were made on your company’s public profile page.
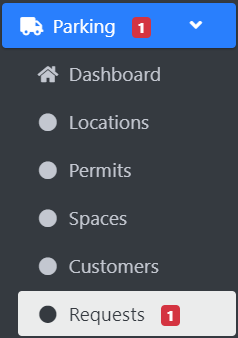
Clicking on the Request section will open a page with a list of parking requests.

In order to view detailed information on requests, you need to click on the request field, detailed information on the request will open.
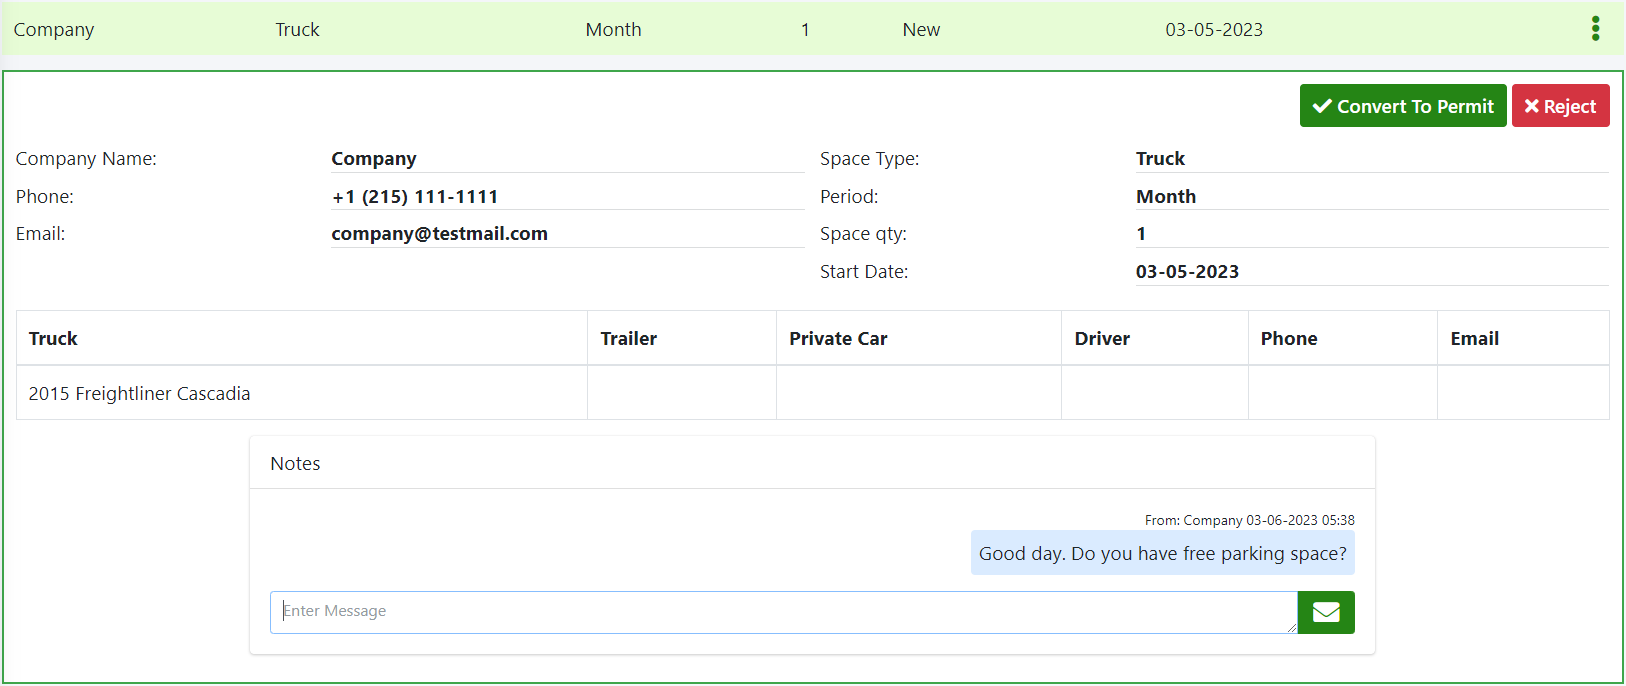
The request contains the following information:
Company Name – the name of the company that made a request for parking
Phone – is a company’s phone that made a request
Email – Male Company that made a request
Space Type – type of parking space
Period – for what period want to book parking
Space qty is the number of parking spaces
Start Date – Date from which to reserve the parking space
The table contains information about the vehicle for which the parking space is released, and the information about the private car and contact data of the driver – telephone and e -mail address may be listed.
It is also possible to exchange messages with the user who left the parking lock in the notes below.
If you need to reject the parking request for some reason, you need to click on the Reject button – the request will be canceled, the user will be sent notification of rejection of the request.
If you need to confirm the parking request, you need to click the Convert to permit button, the permit form will open.
You can find more about creating Permit in the Add New Permit section.
Once you fill out all the information you need and save the form, permit will be created for the user who created the request, which will receive the appropriate notification.